Replacing a string trimmer head is a straightforward DIY task that typically takes 15-30 minutes, requiring basic tools like a wrench and screwdriver. The most crucial step is understanding that most trimmer heads are reverse-threaded, meaning you turn the retaining nut or bolt clockwise to loosen it. This guide details the safe and efficient process for both gas and electric models, ensuring you can quickly resume yard maintenance.
String Trimmer Heads: Overview and Optimal Choices
String trimmers, also known as weed eaters or strimmers, cut grass and weeds using a rapidly spinning line or blade. The cutting head holds this cutting mechanism, and understanding its different types is key to both maintenance and performance.
The most common types of string trimmer heads include: For explore our gas reviews on this site.
- Bump Feed Heads: These are arguably the most popular and user-friendly. They store a spool of line, and when you need more, you simply tap the head on the ground while the trimmer is running. This action releases a fresh length of line. They are simple to operate and generally easy to repair.
- Automatic Feed Heads: Designed for convenience, these heads automatically advance the line as it wears down, removing the need to manually bump the head. While less labor-intensive, they might use more line and can be more prone to jamming if the line quality is poor or incorrect.
- Fixed Line Heads: Unlike spool-based systems, fixed line heads use pre-cut lengths of line that are inserted individually into the head. When a line breaks or wears out, you must stop the trimmer to replace it. These are often favored for heavier-duty tasks where durability and control over line length are priorities.
- Blade Heads / Brushcutter Blades: For tackling tougher vegetation like thick brambles, woody plant material, or dense brush, some trimmers can accommodate plastic or metal blade heads. These are designed for more aggressive cutting jobs where string line might not be effective.
Each type offers distinct advantages depending on your yard’s specific needs and the kind of trimming tasks you’ll be performing. Choosing the right head or replacement often comes down to balancing ease of use, cutting efficiency, and the nature of the foliage you’re managing.
Detailed Guide to Replacing Your String Trimmer Head
Replacing your string trimmer head is a straightforward process once you understand the mechanics and, crucially, adhere to safety protocols. This step-by-step guide ensures a smooth and secure replacement.
Prioritizing Safety Before You Begin
Before touching any part of your string trimmer for maintenance, safety must be your top priority. Neglecting these steps can lead to serious injury.
- Disconnect Power: For gas-powered trimmers, turn off the engine and disconnect the spark plug wire. For electric models, unplug the power cord or remove the battery pack.
- Allow Cooling: If the trimmer has recently been in use, allow ample time for the engine and any hot components to cool down.
- Wear Protective Gear: Always wear sturdy work gloves to protect your hands from sharp edges and debris, and safety glasses to shield your eyes.
- Consult Your Manual: Every string trimmer model can have slight variations. Always refer to your specific owner’s manual for precise instructions and torque specifications.
Removing the Old Trimmer Head
|
Our Picks for the Best String Trimmer in 2026
As an Amazon Associate I earn from qualifying purchases.
|
||
| Num | Product | Action |
|---|---|---|
| 1 | Houselife 12" Cordless Weed Eater Compatible with Dewalt 20V Max Battery (No Battery), Auto Feed Cordless String Trimmer&Weed Wacker, Lightweight Electric 20V Weed Trimmer&Edger for Lawn, Garden, Yard |

|
| 2 | BLACK+DECKER String Trimmer, Electric, 14-inch (BESTE620) |
|
| 3 | WORX Cordless String Trimmer & Lawn Edger, 12'' Electric Weed Wacker with 5.5 LBS, 20V Weed Eater with 90° Pivoting Head, Battery & Charger Included, WG170.2 |
|
| 4 | WORX Cordless String Trimmer & Lawn Edger, 12'' Electric Weed Wacker with 4.6 LBS, 20V Weed Eater with 90° Pivoting Head, Batteries & Charger Not Included, WG170.9 |
|
| 5 | 20V 12" Cordless String Trimmer With 2 X 4.0Ah Battery and Charger, Electric Grass Trimmer Battery Powered Eater String, Edger Lawn Tool Grass Cutter With 8pcs Line, Lawn Mover For Garden Yard, Orange |
|
| 6 | Cordless String Trimmer Compatible with Milwaukee M18 18V Battery(Tool Only), 12-Inch 3-in-1 Weed Eater with 8500RPM Upgraded Motor, Automatic Line Feed Weed Wacker for Lawn Edging and Mowing-Red |
|
| 7 | BLACK+DECKER 20V MAX Weed Eater, Edger and Sweeper Combo, Includes 2 Batteries and Charger, Cordless Electric Weed Wacker and 130 Mph Hard Surface Leaf Blower, 10 in. (LCC222) |
|
| 8 | CRAFTSMAN WEEDWACKER® String Trimmer, 6.5 Amp, 14-Inch (CMEST913) |
|
| 9 | Cordless String Trimmer Compatible with Dewalt 20V MAX Battery, 12-Inch Weed Wacker Cordless Auto Line Feed,Electric Weed Eater Battery Powered Grass Trimmer w/6 Line Spools(Tool Only) |
|
| 10 | BLACK+DECKER Weed Wacker with Auto Feed, 14-Inch 2 in 1 String Trimmer Lawn Edger, Powerful 6.5-Amp Lightweight Electric Weed Eater (BESTA510) |
|
Once safety precautions are in place, you can proceed with removing the worn or broken trimmer head.
- Prepare the Work Area: Lay the trimmer on a stable, flat surface, ensuring easy access to the trimmer head.
- Locate the Spindle Lock: Most string trimmers have a mechanism to lock the shaft or spindle, preventing it from rotating while you loosen the head. This might be a small hole in the gear housing where you can insert a screwdriver, Allen wrench, or a dedicated locking pin provided by the manufacturer. Rotate the trimmer head by hand until the hole in the spindle aligns with the hole in the gear housing, then insert your tool firmly to lock it.
- Unscrew the Head: This is a critical step where many DIYers get stuck. The vast majority of string trimmer heads are reverse-threaded. This means you must turn the retaining nut or bolt clockwise to loosen it, not counter-clockwise as you would with standard threading. Use an appropriately sized wrench or socket. If the nut is stubborn, a penetrating lubricant can help, but apply sparingly.
- Remove the Head: Once the nut or bolt is loose, carefully slide the old trimmer head off the shaft. Some washers or plates may come off with it; note their order for reassembly.
- Clean the Shaft Area: With the old head removed, take this opportunity to thoroughly clean any accumulated grass, dirt, and debris from the shaft, gear housing, and surrounding components using a soft brush or rag. This ensures proper fit and function for the new head.
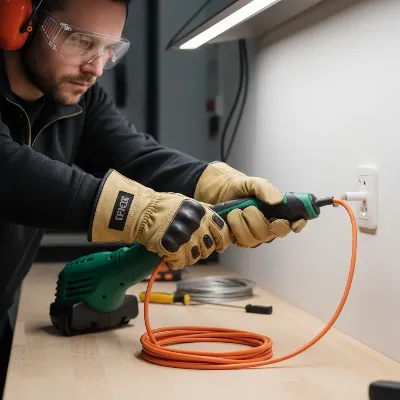 Person preparing string trimmer for maintenance with safety gear
Installing the New String Trimmer Head
With the old head off and the area clean, installing the new head is the reverse process, with careful attention to threading.
- Prepare the New Head: If your new trimmer head comes in parts, assemble it according to the manufacturer’s instructions. If it requires line loading before installation, do so now.
- Position the New Head: Carefully slide the new trimmer head onto the spindle. Ensure it aligns correctly with any keyways or mounting holes.
- Secure the New Head: Replace any washers or plates in their correct order, then re-attach the retaining nut or bolt. Remember the reverse threading: you will now turn the nut or bolt counter-clockwise to tighten it. Hand-tighten it first, then use your wrench or socket to secure it firmly. Avoid overtightening, as this can damage the threads or the head itself.
- Verify Installation: Once tightened, remove your spindle-locking tool. Spin the head by hand to ensure it rotates freely without obstruction. Reconnect the spark plug wire or insert the battery, and briefly test the trimmer in a safe, open area to confirm proper operation.
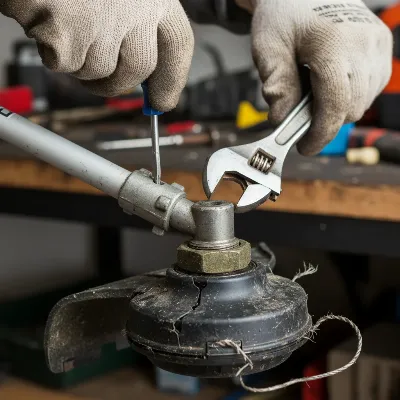 Close-up of a person removing an old string trimmer head with a screwdriver
Essential Tools for the Job
Having the right tools on hand makes the replacement process much smoother and safer:
- Wrench or Socket Set: For loosening and tightening the retaining nut or bolt. The size will vary by trimmer model.
- Screwdriver, Allen Wrench, or Locking Pin: To engage the spindle lock.
- Safety Gloves and Eye Protection: Non-negotiable for personal safety.
- Soft Brush or Rag: For cleaning debris from the shaft area.
- Penetrating Lubricant (Optional): For stubborn or rusted nuts.
“Understanding that most trimmer heads are reverse-threaded is the single most important piece of information for any DIYer. It prevents frustration and potential damage.” – Alex Stone, Master Technician at reviewnpicks.com
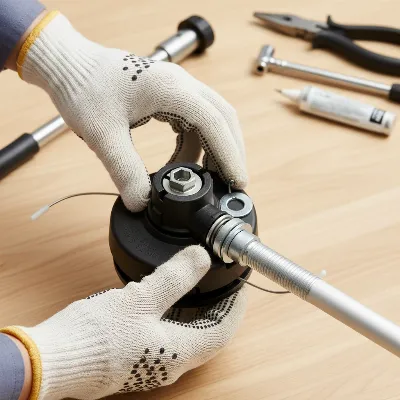 Person installing new string trimmer head, showing alignment
String Trimmer Head: Troubleshooting and Maintenance Tips
Even with a new head, understanding common issues and proper maintenance can significantly extend your trimmer’s lifespan and performance.
Common Issues Leading to Replacement
Sometimes, it’s not just physical damage that necessitates a new head. Other internal issues can mimic a broken head:
- Worn Clutch: If your trimmer head isn’t spinning at all or is spinning weakly, a worn clutch could be the culprit, preventing the drive shaft from engaging properly.
- Defective Trimmer Head: Beyond external damage, internal components of the head can fail, or the threads on the head that attach to the shaft might strip, making replacement essential.
- Melted Line: Overheating from continuous use can cause the trimmer line to melt and fuse together inside the spool, preventing it from feeding out.
- Clogged Ports: Grass, dirt, and debris can accumulate in the line exit ports, blocking the line from advancing.
Prolonging Head Life
Proactive maintenance can dramatically extend the life of your string trimmer head:
- Clean After Each Use: Regularly clear grass clippings, dirt, and sap from the trimmer head and shaft area. This prevents buildup that can cause friction, jams, and premature wear.
- Use the Correct Line: Always use the appropriate diameter and type of trimmer line recommended for your specific head and trimmer model. Using line that’s too thick can overstress the motor and head, while line that’s too thin may break too easily.
- Inspect Regularly: Periodically check the bump knob, eyelets, and other moving parts for wear or damage. Worn components can reduce cutting efficiency and lead to more frequent line breakages.
- Avoid Overloading: Don’t push the trimmer head aggressively into dense weeds or hard surfaces. Allow the line to do the work, using the tip of the line to cut, rather than burying the entire head. This reduces stress on the head and prevents rapid line wear.
Table: Popular String Trimmer Head Types
Understanding the nuances of different trimmer head types can guide your choice, whether replacing an old one or upgrading.
| Head Type | Key Feature | Pros | Cons | Best For |
|---|---|---|---|---|
| Bump Feed | Line advances by tapping head on ground | Easy line advancement, widely available, simple to repair | Can wear faster on hard surfaces, requires stopping to “bump” | General yard work, medium-duty trimming, homeowners |
| Automatic Feed | Line advances automatically | Less manual intervention, continuous trimming | Can use more line, prone to jamming with poor line | Light to medium trimming, convenience-focused users |
| Fixed Line | Uses pre-cut lengths of line inserted individually | Durable, precise line control, good for heavy-duty tasks | Requires stopping to replace lines, slower line changes | Heavy-duty trimming, commercial use, tough weeds |
| Blade Heads | Uses plastic or metal blades instead of line | Effective for very thick brush, woody material | Not for fine trimming, can be dangerous if not used correctly | Clearing dense brush, small saplings, very tough vegetation |
Frequently Asked Questions
How long does it take to replace a string trimmer head?
Replacing a string trimmer head typically takes between 15 to 30 minutes for most DIYers. This estimate includes time for gathering tools, ensuring safety, and performing the removal and installation steps.
What tools are essential for replacing a trimmer head?
Essential tools for replacing a trimmer head include a wrench or socket set for the retaining nut, a screwdriver or Allen wrench for the spindle lock, safety gloves, and eye protection. A soft brush or rag is also useful for cleaning the shaft area.
Are all string trimmer heads reverse-threaded?
The vast majority of string trimmer heads are reverse-threaded. This means you must turn the retaining nut or bolt clockwise to loosen it, which is opposite to standard threading. Always consult your specific owner's manual to confirm.
When should I consider replacing my string trimmer head?
You should consider replacing your string trimmer head when it shows significant physical damage, internal components fail, the threads strip, or if issues like melted line or clogged ports persist despite cleaning. Regular inspection helps identify wear early.
What are the main types of string trimmer heads available?
The main types of string trimmer heads are bump feed, automatic feed, fixed line, and blade heads. Bump feed heads are popular for general use, automatic feed offers convenience, fixed line heads are durable for heavy tasks, and blade heads are for very dense vegetation.
How to Safely Replace Your String Trimmer Head
Follow these steps to safely and efficiently replace a worn or broken string trimmer head, ensuring your tool is ready for use.
Before starting, disconnect power by unplugging electric models or removing the battery, and for gas trimmers, turn off the engine and disconnect the spark plug wire. Allow the trimmer to cool if it was recently used, and always wear sturdy work gloves and safety glasses to protect yourself from injury.
Lay the trimmer on a stable surface. Locate and engage the spindle lock, typically a hole where you insert a tool to prevent rotation. Then, using an appropriately sized wrench, turn the retaining nut or bolt clockwise to loosen it, as most trimmer heads are reverse-threaded. Carefully slide the old head off the shaft and clean any debris.
Assemble the new head if necessary and slide it onto the spindle, ensuring proper alignment. Replace any washers in their correct order. To secure the new head, turn the retaining nut or bolt counter-clockwise to tighten it, remembering the reverse threading. Hand-tighten first, then use a wrench to secure it firmly without overtightening.
Remove the spindle-locking tool and spin the new head by hand to confirm it rotates freely. Reconnect the power source (spark plug wire or battery). Briefly test the trimmer in a safe, open area to ensure it operates correctly and the new head functions as expected.
Get our weekly buyer guide
Practical specs, not advice. Unsubscribe anytime.

Fantastic guide! I always assumed replacing the string trimmer head was a job for a professional, but this DIY approach was surprisingly easy. The explanation of why some heads are reverse-threaded made perfect sense and prevented me from forcing it the wrong way. My yard looks much better now that I can actually trim the edges properly.
Good breakdown of the process. I appreciated the mention of needing just basic tools like a wrench and screwdriver; I already had everything on hand. My gas model’s head was a bit stubborn, but knowing about the clockwise-to-loosen rule for most heads saved me from stripping anything. It’s working great now, though getting the new line spooled perfectly took a couple tries.
I’ve been putting off replacing my old bump feed head for ages because I thought it would be a huge hassle. This guide was a lifesaver! The tip about the reverse-threaded nut was exactly what I needed to know. It really did only take me about 20 minutes to get my electric trimmer back in action. Highly recommend following these steps.
The instructions were clear for the most part, especially about the different types of heads. However, I found that my specific brand of trimmer had a slightly different retaining bolt than what was pictured, which made the initial removal a bit confusing. It eventually worked out, but a bit more detail on variations might be helpful for some. Still, my weed eater is functional again.