Replacing the fuel line on your gas string trimmer is a common maintenance task that can significantly improve its performance and longevity. This DIY guide will walk you through the process, which typically takes about 30-60 minutes depending on your trimmer model and experience level. A worn or cracked fuel line can lead to starting issues, poor engine performance, and even fuel leaks, making timely replacement crucial for optimal operation.
Why Fuel Lines Fail and When to Replace Them
Fuel lines on gas string trimmers are susceptible to degradation over time due to exposure to fuel, UV light, and general wear and tear. Ethanol in modern gasoline can be particularly harsh on rubber and plastic components, causing them to become brittle, crack, or swell. You should inspect your fuel lines regularly, especially if your trimmer is difficult to start, runs erratically, or if you notice any visible cracks, leaks, or hardening of the lines. A good rule of thumb is to consider replacement every 2-3 years, even if no obvious damage is present, as a preventative measure. For browse all gas articles on this site.
Tools and Materials You’ll Need
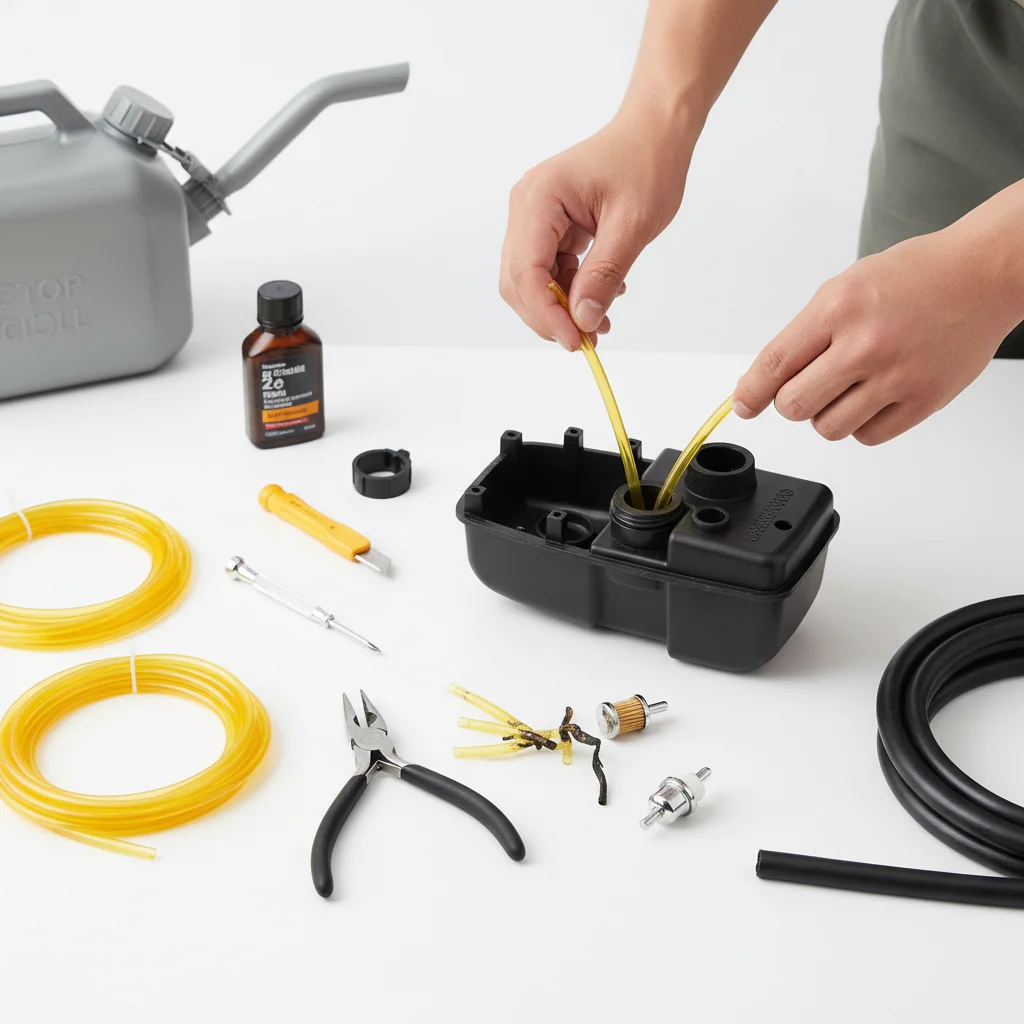
Before you begin, gather all the necessary tools and materials. Having everything on hand will make the replacement process smoother and more efficient. You’ll need a new fuel line kit (specific to your trimmer’s make and model), a pair of needle-nose pliers, a utility knife or sharp scissors, a small flathead screwdriver, and safety glasses. Some kits may include a fuel filter and grommet, which are good to replace simultaneously.
- New fuel line kit (correct diameter and length)
- Needle-nose pliers
- Utility knife or sharp scissors
- Small flathead screwdriver
- Safety glasses
Step-by-Step Fuel Line Replacement Process
|
Our Picks for the Best String Trimmer in 2026
As an Amazon Associate I earn from qualifying purchases.
|
||
| Num | Product | Action |
|---|---|---|
| 1 | 20V 12" Cordless String Trimmer With 2 X 4.0Ah Battery and Charger, Electric Grass Trimmer Battery Powered Eater String, Edger Lawn Tool Grass Cutter With 8pcs Line, Lawn Mover For Garden Yard, Orange |

|
| 2 | WORX Cordless String Trimmer & Lawn Edger, 12'' Electric Weed Wacker with 5.5 LBS, 20V Weed Eater with 90° Pivoting Head, Battery & Charger Included, WG170.2 |
|
| 3 | WORX Cordless String Trimmer & Lawn Edger, 12'' Electric Weed Wacker with 4.6 LBS, 20V Weed Eater with 90° Pivoting Head, Batteries & Charger Not Included, WG170.9 |
|
| 4 | BLACK+DECKER 20V MAX Weed Eater, Edger and Sweeper Combo, Includes 2 Batteries and Charger, Cordless Electric Weed Wacker and 130 Mph Hard Surface Leaf Blower, 10 in. (LCC222) |
|
| 5 | CRAFTSMAN WEEDWACKER® String Trimmer, 6.5 Amp, 14-Inch (CMEST913) |
|
| 6 | Cordless String Trimmer Compatible with Milwaukee M18 18V Battery(Tool Only), 12-Inch 3-in-1 Weed Eater with 8500RPM Upgraded Motor, Automatic Line Feed Weed Wacker for Lawn Edging and Mowing-Red |
|
| 7 | BLACK+DECKER String Trimmer, Electric, 14-inch (BESTE620) |
|
| 8 | Houselife 12" Cordless Weed Eater Compatible with Dewalt 20V Max Battery (No Battery), Auto Feed Cordless String Trimmer&Weed Wacker, Lightweight Electric 20V Weed Trimmer&Edger for Lawn, Garden, Yard |
|
| 9 | BLACK+DECKER Weed Wacker with Auto Feed, 14-Inch 2 in 1 String Trimmer Lawn Edger, Powerful 6.5-Amp Lightweight Electric Weed Eater (BESTA510) |
|
| 10 | Cordless String Trimmer Compatible with Dewalt 20V MAX Battery, 12-Inch Weed Wacker Cordless Auto Line Feed,Electric Weed Eater Battery Powered Grass Trimmer w/6 Line Spools(Tool Only) |
|
First, ensure your string trimmer is cool and disconnected from any spark plug wire to prevent accidental starting. Drain any remaining fuel from the tank into an approved container. Next, locate the fuel lines entering and exiting the fuel tank. Carefully use your needle-nose pliers to pull the old fuel lines out of the tank, noting which line goes to the carburetor and which goes to the primer bulb. You may need to gently pry out the grommet if it’s integrated with the lines. Once the old lines are removed, cut your new fuel lines to the appropriate length, ensuring they are long enough to reach their respective connections without kinking. Feed the new lines through the tank’s grommet holes, using the needle-nose pliers to guide them. Connect the lines to the carburetor and primer bulb according to your trimmer’s diagram or the way the old lines were routed. Finally, replace the fuel filter if necessary, ensuring it’s submerged in the fuel tank.
Testing and Troubleshooting After Replacement
After installing the new fuel lines, refill the fuel tank with fresh, properly mixed fuel. Prime the carburetor several times until you see fuel flowing through the clear primer bulb (if applicable). Reconnect the spark plug wire and attempt to start the trimmer. It may take a few extra pulls to get the engine running as the new lines fill with fuel. If the trimmer doesn’t start or runs poorly, double-check all your connections to ensure the lines are securely attached and routed correctly. Inspect for any kinks in the lines that might restrict fuel flow. If issues persist, consult your trimmer’s owner’s manual for specific troubleshooting steps or consider taking it to a professional.
Get our weekly buyer guide
Practical specs, not advice. Unsubscribe anytime.
Good info here. I had a cracked fuel line on my Stihl and was getting frustrated with it running erratically. Following the steps, I got it swapped out. The only thing I’d add is to make sure you have a good pair of needle-nose pliers for getting those old lines out, especially if they’re really brittle. Made a big difference in performance.
I’ve been putting off replacing the fuel line on my old Poulan Pro for ages because I thought it would be a huge hassle. This guide made it so straightforward! It really did only take me about 45 minutes, and now my trimmer starts on the first pull instead of me wrestling with it for ten minutes. Definitely worth the small effort.
I tried to replace the fuel line on my Ryobi, but I found it a bit trickier than the 30-60 minute estimate. Getting the new line threaded through the tank was a real pain, and I ended up needing a friend to help me. My trimmer is running better now, but it wasn’t as quick or easy as I hoped it would be for a beginner.
My Husqvarna trimmer was having major starting issues, and I suspected the fuel line after noticing some small cracks. This guide was a lifesaver. It walked me through each step clearly, and I was able to get it done without any special tools beyond what I already had in my garage. No more wrestling with the pull cord!