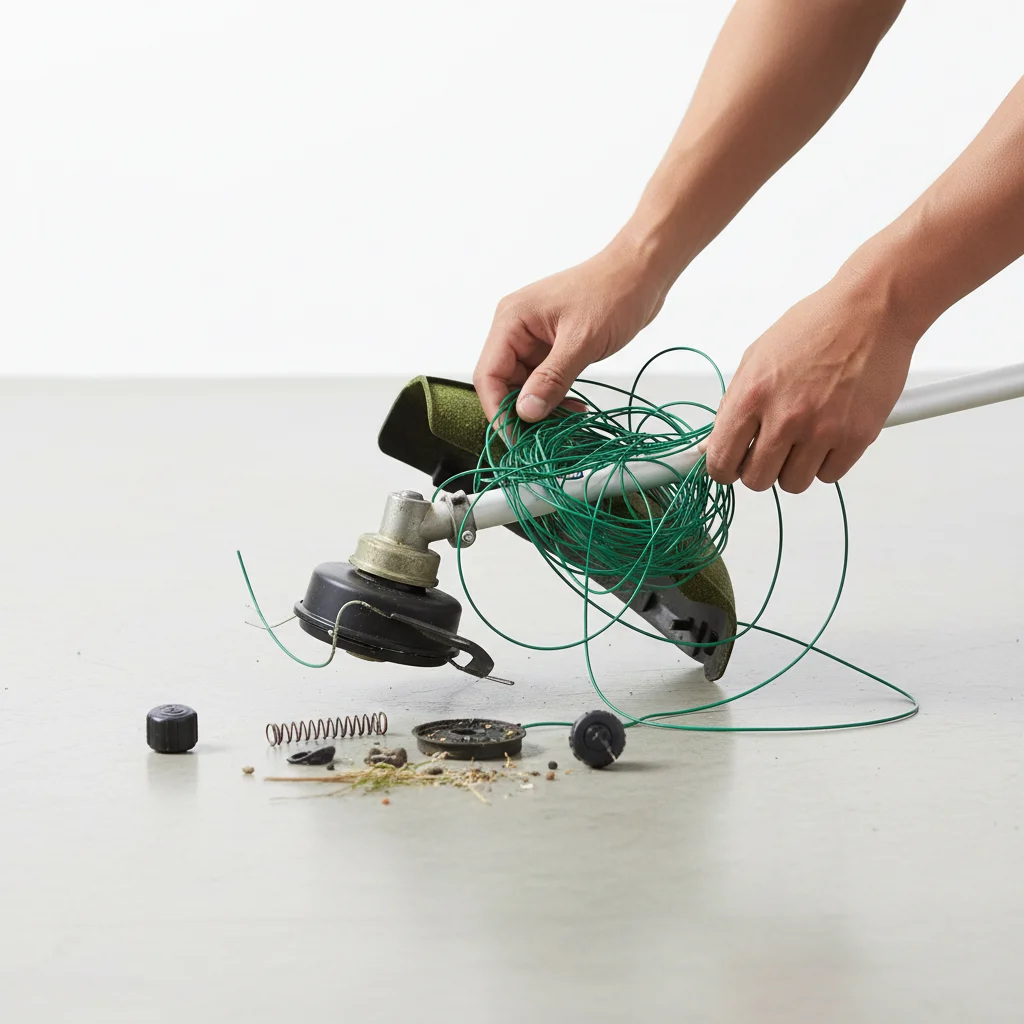
When your string trimmer refuses to feed line, it can quickly turn yard work into a frustrating ordeal. There are five primary reasons why this common issue occurs, ranging from incorrect line installation to mechanical failures within the trimmer head. Understanding these causes is the first step to a quick and effective repair, getting you back to a pristine lawn.
Incorrect Line Installation or Spooling
One of the most frequent culprits behind a string trimmer that won’t feed line is improper installation or spooling of the trimmer line itself. If the line is wound too loosely, too tightly, or in the wrong direction, it can bind within the spool or prevent the feed mechanism from engaging. Always refer to your trimmer’s manual for the correct winding direction and tension. Many spools have arrows indicating the proper winding path. Ensure the line is wound evenly and snugly, without any overlaps or gaps that could cause tangles.
Another common mistake is using the wrong line diameter for your trimmer head. While a thicker line might seem more durable, if it’s too large for the head’s design, it will jam and prevent proper feeding. Conversely, line that is too thin might break too easily or not engage the feed mechanism effectively. Always use the line diameter recommended by the manufacturer for optimal performance.
Damaged or Worn Trimmer Head Components
The trimmer head itself contains several components crucial for line feeding, and any damage or wear to these parts can disrupt the process. The eyelets, through which the line exits the head, can become worn, grooved, or clogged with debris, creating friction that prevents the line from advancing. Inspect these eyelets regularly and clean them as needed, replacing them if they show significant wear.
Internal components like the spring, cam, or pawls (depending on your head type) can also wear out or break. The spring provides the tension needed for the bump-feed mechanism, and if it’s weak or broken, the line won’t advance. The cam or pawls are responsible for gripping and releasing the line. If these are damaged, the line will either not feed or feed continuously. A thorough inspection of the disassembled head will reveal any broken or missing parts that need replacement.
Debris or Tangles Inside the Head
|
Our Picks for the Best String Trimmer in 2026
As an Amazon Associate I earn from qualifying purchases.
|
||
| Num | Product | Action |
|---|---|---|
| 1 | CRAFTSMAN WEEDWACKER® String Trimmer, 6.5 Amp, 14-Inch (CMEST913) |

|
| 2 | BLACK+DECKER Weed Wacker with Auto Feed, 14-Inch 2 in 1 String Trimmer Lawn Edger, Powerful 6.5-Amp Lightweight Electric Weed Eater (BESTA510) |
|
| 3 | BLACK+DECKER 20V MAX Weed Eater, Edger and Sweeper Combo, Includes 2 Batteries and Charger, Cordless Electric Weed Wacker and 130 Mph Hard Surface Leaf Blower, 10 in. (LCC222) |
|
| 4 | 20V 12" Cordless String Trimmer With 2 X 4.0Ah Battery and Charger, Electric Grass Trimmer Battery Powered Eater String, Edger Lawn Tool Grass Cutter With 8pcs Line, Lawn Mover For Garden Yard, Orange |
|
| 5 | Cordless String Trimmer Compatible with Dewalt 20V MAX Battery, 12-Inch Weed Wacker Cordless Auto Line Feed,Electric Weed Eater Battery Powered Grass Trimmer w/6 Line Spools(Tool Only) |
|
| 6 | WORX Cordless String Trimmer & Lawn Edger, 12'' Electric Weed Wacker with 4.6 LBS, 20V Weed Eater with 90° Pivoting Head, Batteries & Charger Not Included, WG170.9 |
|
| 7 | Houselife 12" Cordless Weed Eater Compatible with Dewalt 20V Max Battery (No Battery), Auto Feed Cordless String Trimmer&Weed Wacker, Lightweight Electric 20V Weed Trimmer&Edger for Lawn, Garden, Yard |
|
| 8 | BLACK+DECKER String Trimmer, Electric, 14-inch (BESTE620) |
|
| 9 | Cordless String Trimmer Compatible with Milwaukee M18 18V Battery(Tool Only), 12-Inch 3-in-1 Weed Eater with 8500RPM Upgraded Motor, Automatic Line Feed Weed Wacker for Lawn Edging and Mowing-Red |
|
| 10 | WORX Cordless String Trimmer & Lawn Edger, 12'' Electric Weed Wacker with 5.5 LBS, 20V Weed Eater with 90° Pivoting Head, Battery & Charger Included, WG170.2 |
|
Even with proper line installation, debris can accumulate inside the trimmer head, causing tangles and preventing the line from feeding. Grass clippings, dirt, and small twigs can get lodged around the spool or within the feeding mechanism, creating blockages. This is especially common when trimming in dense or wet conditions.
To address this, always clear the trimmer head of any accumulated debris after each use. If you encounter a feeding issue, disassemble the head and thoroughly clean all internal components. Remove any tangled line fragments or foreign objects. A small brush or compressed air can be effective for dislodging stubborn debris. Regular cleaning can prevent many feeding problems before they start.
Incorrect Line Type or Quality
The type and quality of your trimmer line can significantly impact its feeding performance. Cheap, low-quality line can be brittle, leading to frequent breaks and inconsistent feeding. It might also have an uneven diameter, causing it to snag within the head. Investing in a good quality line, even if it costs a little more, can save you a lot of frustration in the long run.
Furthermore, using the wrong type of line for your specific trimmer or task can cause issues. For example, some trimmers perform better with round line, while others are designed for square, star, or twisted profiles. While many lines are universal, checking your trimmer’s recommendations can ensure optimal feeding. Also, old line can become dry and brittle, making it prone to breaking and poor feeding. Store your trimmer line in a cool, dry place to maintain its flexibility and integrity.
Common Fixes for Line Feeding Issues
- Re-spool the line correctly: Ensure even winding, correct direction, and appropriate tension.
- Clean the trimmer head: Remove all debris, grass, and tangled line from inside the head and around the spool.
- Inspect and replace worn parts: Check eyelets, springs, cams, and pawls for damage and replace as needed.
- Use the correct line diameter and type: Refer to your trimmer’s manual for recommended specifications.
- Lubricate the head: A small amount of silicone spray on the eyelets can reduce friction and improve feeding.
By systematically checking these five areas, you can diagnose and resolve most string trimmer line feeding problems. Regular maintenance and using the correct parts and line will ensure your trimmer operates smoothly and efficiently.
Get our weekly buyer guide
Practical specs, not advice. Unsubscribe anytime.
